
Practical Installation Considerations
The use of adhesive anchors is a common method of forming attachments in both existing concrete and masonry base materials. They are widely used for structural connections, including steel reinforcement embedments, mounting non-structural components, equipment anchorage, and other miscellaneous hardware. The popularity of adhesive anchors in construction practice necessitates an opportunity to discuss, encourage, and promote good installation practice when these products are utilized.
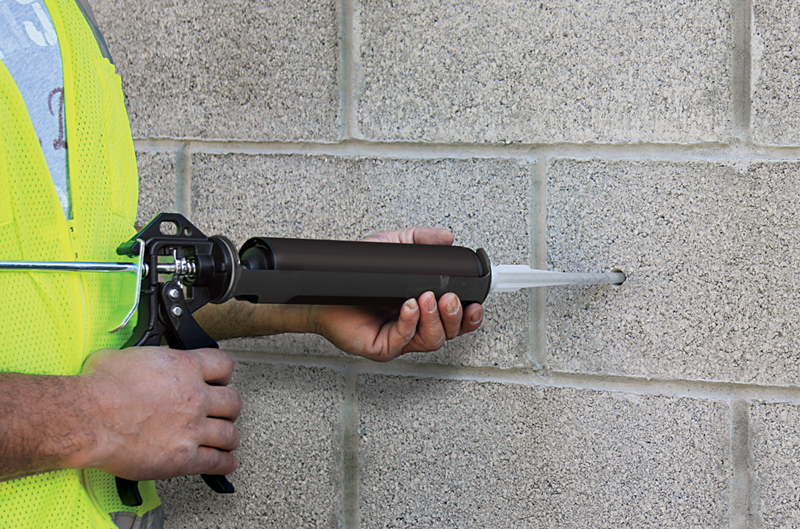
Injecting adhesive into drilled holes in masonry to make an anchor connection.
There are important aspects that can directly influence proper installation practice of adhesive anchor systems in masonry and minimize potential issues that may arise surrounding their use and service in the field. Key considerations include:
- Masonry base material type and installation location
- Anchor system selection and preparation
- Hole drilling and drilled hole cleaning
- Adhesive system, installation, and curing
- Special inspections and proof loading on site
Base Materials and Installation
Adhesive anchors rely on the bond formed to the inside of a drilled hole and the transfer of loads locally into the masonry base material. Understanding the type, condition, and capability of masonry relative to the anchorage is significant. Installers and users should have a working knowledge of the material prior to any physical anchorage. Site testing may be appropriate where the wall strength at planned anchorage locations is unknown.
Masonry block and brick are found in a variety of sizes and shapes (depending upon the age and location of a building) and both hollow and solid styles. Mortar strength, consistency, and conditions can vary significantly in existing structures, especially in older walls exposed to the elements. The combination of masonry components, including grout for solid filled Concrete Masonry Unit (CMU) members, is critical to the behavior of the composite member and ultimately has a significant influence on the anchorage strength.
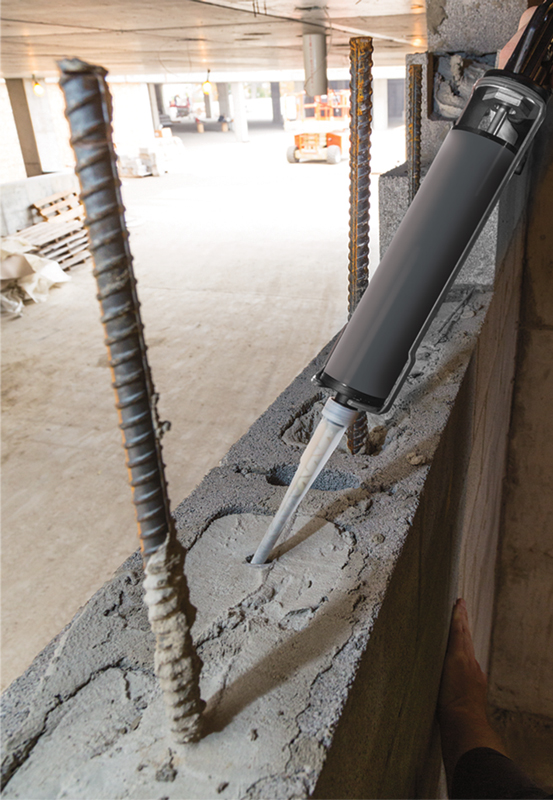
Bonding rebars into grouted concrete masonry walls.
Installation of adhesive anchors, common in solid block or brick, may be in the face, end, or top of the wall. In hollow base materials, anchors may be installed through the face of material into the cavity section provided the adhesive is suitable for use with screen tubes. The screen tubes hold the adhesive in place before installation of the steel anchor element (i.e., threaded rod or rebar). Anchoring locations in the mortar joint are also possible; however, additional care should be taken depending on the masonry wall type. Mortar joints of hollow CMU walls and most vertical joints of CMU walls are only required to be mortared the depth of the face shell. Consequently, these locations should generally not be used for anchoring unless the product manufacturer has specific data and installation instructions for these locations. Similarly, joint locations in the top of masonry walls can be problematic and should be approached with caution if considered for anchorage.
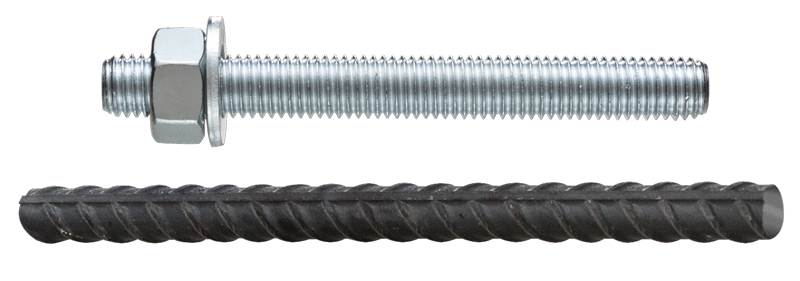
Threaded rod and reinforcing bars (typical steel anchor elements).
Anchor System Selection and Preparation
For any adhesive anchoring application, product selection that is suitable for the masonry base material type and environment is critical. For example, some products are not suitable for both solid and hollow masonry applications because they may not work effectively in conjunction with screen tubes in locations with open cells, cavities, or significant voids. Select a product with a current product evaluation report from a recognized approval body (e.g., the International Code Council’s Evaluation Service, ICC-ES) for the masonry base material whenever possible. This provides an additional level of product testing and qualification, ongoing third-party quality control inspections, and a requirement for the manufacturer to provide installation instructions with each adhesive unit package.
Consider the temperature impact of base material and adhesive during installation. Epoxy based formulas typically have a minimum application temperature of 40°F to 50°F while ‘acrylic’ or hybrid formulas can be used in colder weather with lower temperature limits. Masonry base materials that are too cold for the adhesive will prevent the adhesive anchors from curing properly or not curing at all. Practical limits of the dispensing and mixing of the adhesive should be clearly understood at both low and high temperatures. Adhesive products that are too cold or not conditioned to a minimum temperature will be difficult or impossible to dispense/mix. Very warm environments can cause adhesive products to have short working times and cause some products to become runny unless they are specifically formulated to have good standing behavior at high temperatures.
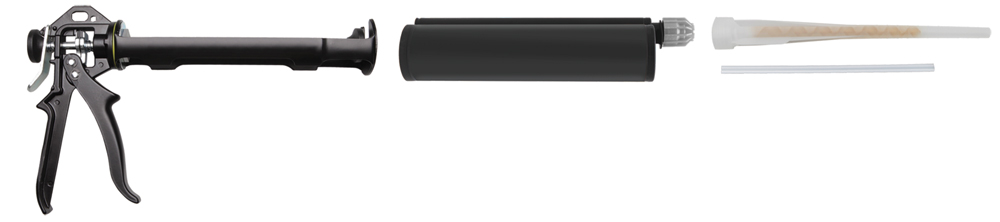
Adhesive anchor system (dispensing tool, cartridge adhesive and mixing nozzle components shown).
Most current adhesive anchor systems have a maximum shelf life between 9 months and 2 years, depending on manufacturer and chemistry. Expired product should never be used unless the manufacturer is willing to provide proof or certify the material is still acceptable for use.
In any case, the product manufacturer should be consulted concerning the capabilities and limitations of the adhesive anchor product if the available information is not clear.
Hole Drilling and Cleaning
The drilling method can have an influence when drilling holes in masonry materials. Installers most commonly will use a rotary hammer drill (i.e., percussion drilling) to create holes in the base material. For solid base materials, this is standard practice and does not introduce any issues. However, in hollow base materials or very weak substrates, rotary-only drilling may be considered or required to limit any potential damage to the masonry from percussion drilling (e.g., unreinforced masonry [URM] walls undergoing seismic retrofits). Drilling that causes excessive spalling on the backside of hollow cavities can reduce the effectiveness of the adhesive anchor connection due to the reduced material thickness.
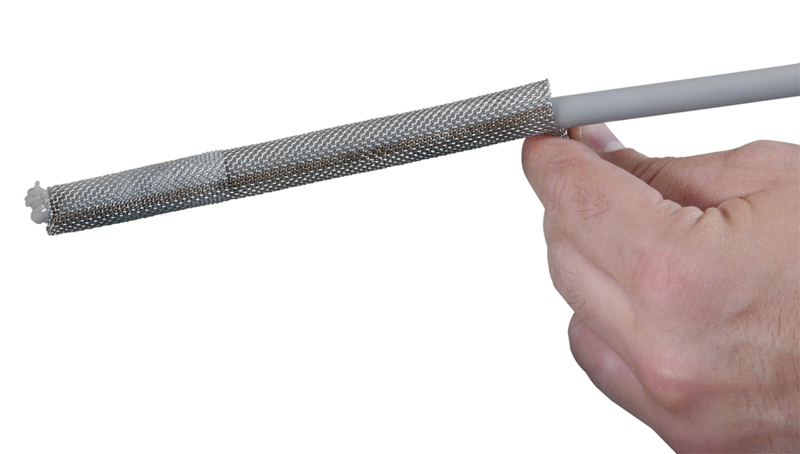
Screen tubes for hollow masonry base materials (e.g. open cells, cavities).
The masonry drill bit size must meet ANSI requirements and follow the recommendations and requirements of the manufacturer’s published installation instructions (MPII). Adhesive anchor diameters generally range from 3⁄8 inch to ¾ inch in masonry. Corresponding drill bit diameters can range from 7⁄16 inch to 1 inch depending on the product and whether or not adhesive anchors are being used in conjunction with screen tubes (which require larger holes to accommodate the screens in hollow materials). Typical embedments into masonry wall faces range from approximately 3 to 6½ inches in solid materials depending on the width of the wall, although deeper embedments are possible for top of wall anchorages. Embedments into hollow materials can vary greatly depending on the material, geometry, and availability of screen tube lengths in the selected diameter.
Prior to adhesive installation, it is critical that the holes be clean and free of dust, debris, ice, grease, oil, or other foreign material. Traditionally, holes are cleaned following drilling using a method of blowing or vacuuming the holes, then using an appropriately sized brush to scour the sides of the hole, and then blowing or vacuuming the holes again (a.k.a., blow, brush, blow). More recently, hollow drill bit systems have been introduced that allow installers to automatically clean the holes during the drilling process with no further hole cleaning required. However, these systems should be monitored for effectiveness, especially in conditions where the masonry drilling locations are wet or saturated because drill bits can clog during use in these conditions.
Installation and Curing
The selected manufacturer’s adhesive anchor system is essential to the success of the installation. System components typically include the following:
- The adhesive: multiple use cartridges or foil packs; single-use-capsules are less common but available
- Mixing nozzles/Dispensing tools (for injection type systems)
- Hole cleaning equipment
- Injection and/or placement accessories
Today’s most popular adhesive anchor systems are injection systems. These systems allow for flexibility in anchor sizes, embedments, and allow for multiple uses.
A supplied mixing nozzle for the adhesive must be used and attached to the cartridge or foil pack before use. These nozzles proportion the adhesive and provide a simple delivery method into the drilled holes. Although mixing nozzles for these injection systems can look very similar, they should only be used with the recommended system (e.g., do not use Brand X mixing nozzle with Brand Y adhesive). The installer should make sure mixing elements are inside the nozzle before using. If the mixed adhesive hardens in the mixing nozzle (when the working time of the product is exceeded), a new mixing nozzle will be necessary. A new mixing nozzle should be used with every cartridge change. Mixing nozzles should not be modified unless directed by the product manufacturer.
Before inserting a threaded rod or rebar into the drilled hole, the embedment depth should be marked on the anchor. This practice helps the installer verify that the steel element was installed to the necessary embedment during and following installation. The threaded rod or rebar must be clean, straight, and free of mill scale, rust, oil, and other coatings (other than zinc) that may impair the bond with the adhesive.
Cartridges or foil packs should be used with and properly loaded into the recommended dispensing tools. Adhesives must be properly mixed to cure and achieve the manufacturer’s published properties. For new cartridges and nozzles (and prior to dispensing adhesive into the drilled hole), separately dispense some adhesive through the mixing nozzle and verify that the adhesive is a consistent mixed color (reference published product instructions for specifics).
During the adhesive injection, cleaned holes are typically filled approximately one-half to two-thirds full of the mixed adhesive for installations in solid masonry materials. Start the injection from the bottom or back of the anchor hole and slowly withdraw the mixing nozzle as the hole fills to avoid creating air pockets or voids. Screen tubes are completely filled in hollow materials. Use a nozzle extension with the mixing nozzle if the bottom or back of the anchor hole/screen tube is not reached with the mixing nozzle only. Following this, the clean threaded rod or reinforcing bar is pushed into the anchor hole, while turning slightly to ensure positive distribution of the adhesive, until reaching the embedment depth. Completely fill the annular gap at the masonry surface following the insertion of the steel element. Remove any excess adhesive at the masonry surface and wipe clean any exposed threads that have been fouled with adhesive. The excess adhesive on the masonry surface or threads may hamper installation after the adhesive hardens.
Adhesives must be allowed to cure for the full specified curing time prior to applying any load (reference published curing times for the selected product). Anchors should not be disturbed, torqued, or loaded until the adhesive is fully cured. After full curing of the adhesive anchor, a fixture or attachment can be made to the anchor. For torqued anchors, the maximum torque allowed for the diameter and embedment into the masonry substrate must not be exceeded. This can vary considerably depending on the product and whether the masonry application is solid or hollow. Applying excess torque can damage or cause bond failure of the adhesive to the substrate.
Special Inspections and Proof Loading
Special inspections have been used for years to help ensure a basic level of knowledge and competence by the actual installation personnel. Section 1704 of the International Building Code (IBC) requires periodic special inspections for adhesive anchors in masonry building construction. The special inspector is expected to be on the job site initially during anchor installation and must verify that the anchor installation complies with the manufacturer’s published installation instructions and code evaluation report, as applicable, by the local authority having jurisdiction (AHJ).
Special inspectors need to verify and document important information such as anchor type, size and dimension, masonry type and strength, drill bit size, anchor spacing and edge distances, embedment, and adherence to the manufacturer’s published installation instructions. For any significant change in site conditions, installation personnel, adhesive anchor system, etc., or for ongoing installations over an extended period of time, the special inspector should make supplemental periodic inspections to reconfirm the correct handling and installation of the selected product.
Proof loading can also be considered for use as a supplemental tool to help verify proper adhesive anchor installations in masonry. This is especially true if the existing base material is questionable in materials or strength, or if it varies significantly depending on location. Proof loading involves the application of a predetermined amount of tension to an installed anchor without causing any damage to it or the surrounding base material. The essential components of a proof load requirement are size and type of anchors to be tested, the percentage of each type and size to be tested, proof loads to be applied for each type and size, and general requirements of acceptance. Proof loading requirements should be determined by the design professional responsible for the anchorage and may vary depending upon the specifics of location and connection detail. Also, if proof loading is used, the possible consequences should be considered for cases where an anchor fails during the proof load test, especially since a large percentage of anchors are installed horizontally into masonry walls.
Conclusion
Installation issues with adhesive anchor systems in masonry can be avoided with sufficient knowledge, proper training, and good practice. Understanding and following the manufacturer’s published installation instructions, as well as using recommended equipment and accessories for the application, is critical. Special inspections are an effective quality control tool and should be strongly considered, even if not required. Realizing the practical application and limitations of adhesive anchor systems can improve the user experience, make the installation process more efficient, and improve the long-term performance of the connection during service.■